Want to create a banner for your course in Blackboard, but you aren’t sure how to get started? Try out our Banner Maker!
Visit the Banner Maker to create your own banners for your courses in Blackboard! You will log in using your UARK username (just the username, do not include @uark.edu ) and password that you use for Blackboard.
Use the tools on the left side to design your course banner. The banner preview will update as you make changes. Once your banner is finished, click the Download Banner button. The file will be saved to your computer as a .png file with a transparent background that you can add to your course.
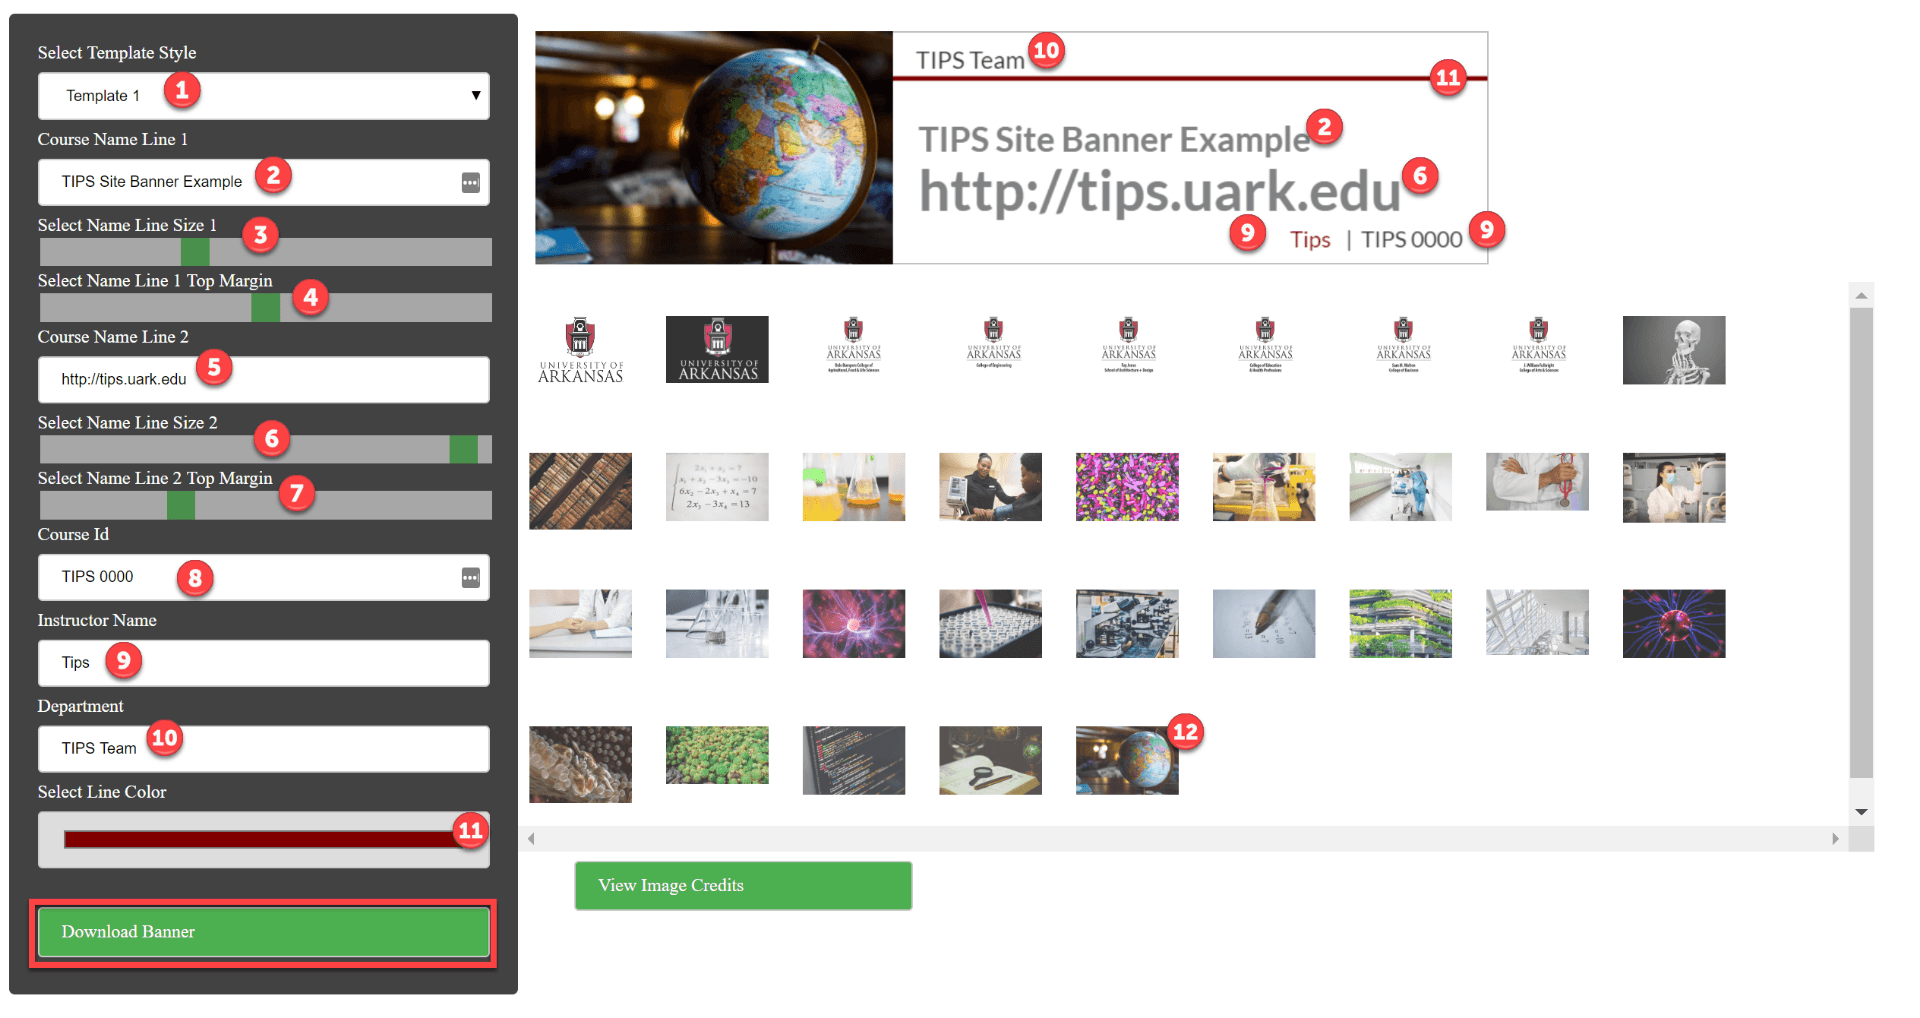
- In the Select Template Style dropdown choose from the template style options.
- In Course Name Line 1, type your course name.
- Adjust the Select Name Line Size 1 slider bar to adjust the size of the Course Name Line 1.
- Under Select Name Line 1 Top Margin adjust the slider to move the Course Name Line 1 up or down.
- In Course Name Line 2, type the secondary course name.
- Adjust the Select Name Line Size 2 slider bar to adjust the size of the Course Name Line 1.
- Under Select Name Line 2 Top Margin adjust the slider to move the Course Name Line 1 up or down.
- In the Course Id, type the course ID.
- Type your name under Instructor Name.
- Type your department name under Department.
- Click on the line beneath Select Line Color to choose the main color of the banner, the details of which change from one template to the next.
- Click on an image if your template choice includes one.
- Click Download Banner to download the image. The title will be “my-banner.png.”
Now you can add the banner to your course.
Note: If you would like to use an image other than those provided in the banner maker tool, it is quick and easy to overlay a new image using PowerPoint. When you make your banner using the tool, select an image as a place holder (the UARK logo with the white background works well). In PowerPoint, go to the Design tab and click Slide Size. Select Custom and change the size to 12.5 inches by 4.948 inches. Now you can insert the my-banner.png file you made with the banner maker and then insert the image you want for your banner. Make sure to use images that belong to you or you have been granted permission to use the image (as with creative commons licenses). Save the powerpoint slide as a JPEG (.jpg) and add the banner to your course.
Examples of Templates:
Template 1

Template 2

Template 3