When you copy a course from a previous semester, it is often time-consuming to go through and change the due dates or set the availability for assignments, blogs, journals, announcements, and other content items. The Date Management tool is a way to view and change all of the due dates and availability dates in a single place. Click here to understand the different options that the Date Management tool offers.
The Date Management Tool allows you to change the dates individually or automatically. We recommend that you change the dates individually for several reasons. If the semester does not begin on a Monday, if you are switching from a Tuesday/Thursday course to a Monday/Wednesday/Friday course (or vice versa), or if it is a leap year you would not want to automatically adjust the dates because the tool does not account for the differences that these issues present. Below there are four options for changing the dates in your course. Instructions for changing the dates individually (recommended) are presented first.
To Use the Date Management Tool:
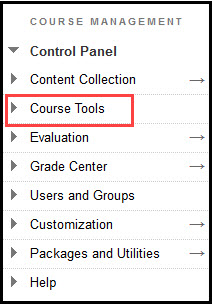
- In your course, go to the “Course Management” section on the left menu bar and click Course Tools.
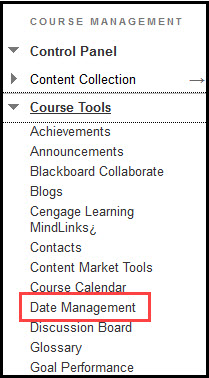
- Click Date Management.
- From here you have four options. Choose one of the options and skip to the instructions for that option below:
- Option A: Adjusting the Dates Individually
- Option B: Use Course Start Date
- Option C: Use Term Info
- Option D: Adjust By Number of Days
Option A: Adjusting the Dates Individually (Recommended)
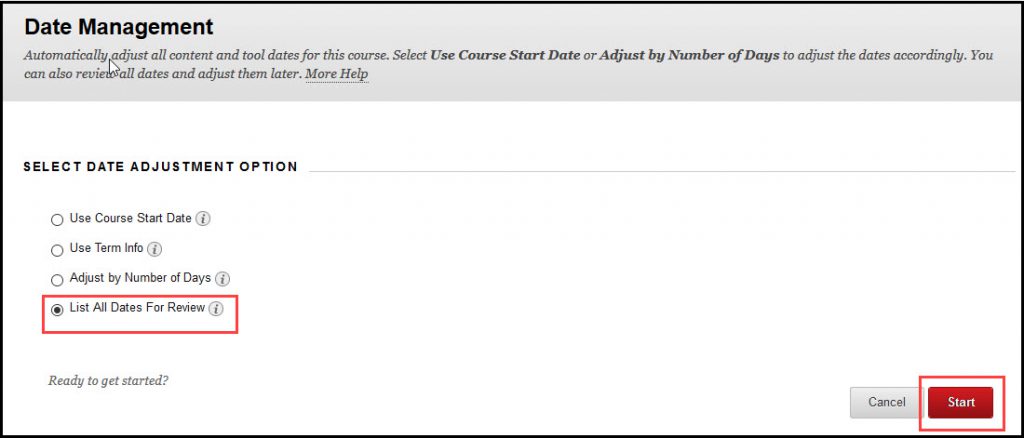
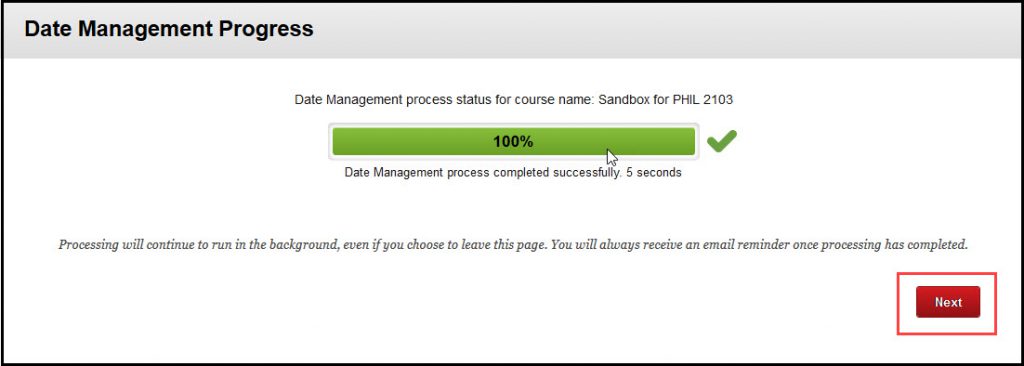
- Click the “List All Dates For Review” option, then click the Start button.
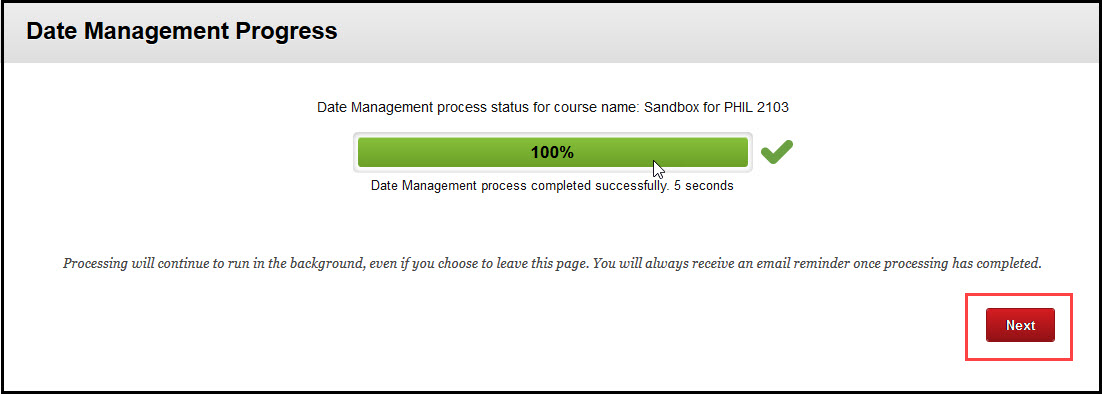
- Once the Date Management tool has processed the request, click the Next button. You will receive an email when the request has been processed.
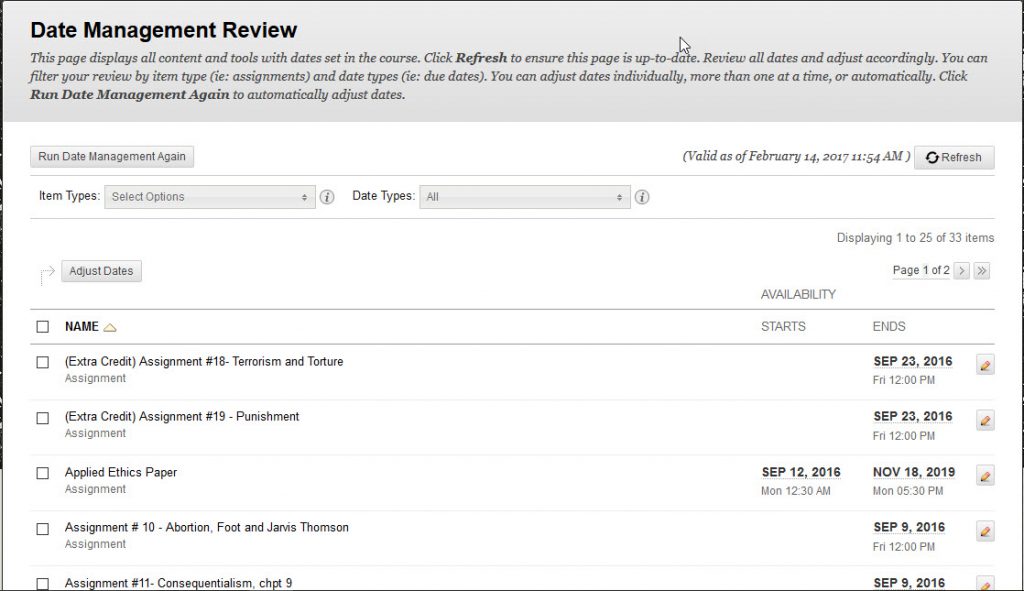
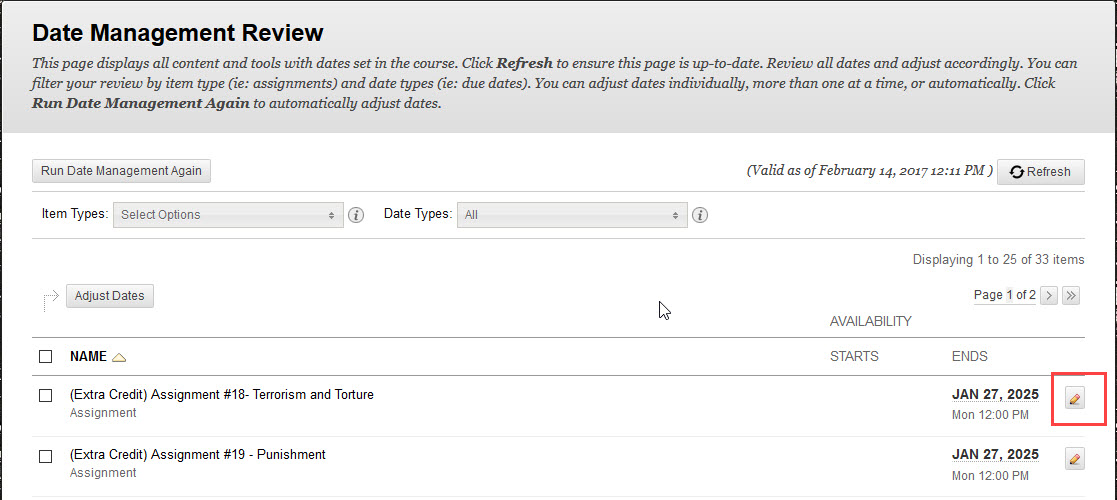
- You should have a list of all of the assignments, tools, content items, etc that have due dates and/or availability dates.
Important Note: Only those things that already have due dates or availability dates will appear here. If you want to add a due date or availability date to something that does not have one, you will need to go in and manually change this by going to the assignment, item, etc. you wish to change and editing it from there.
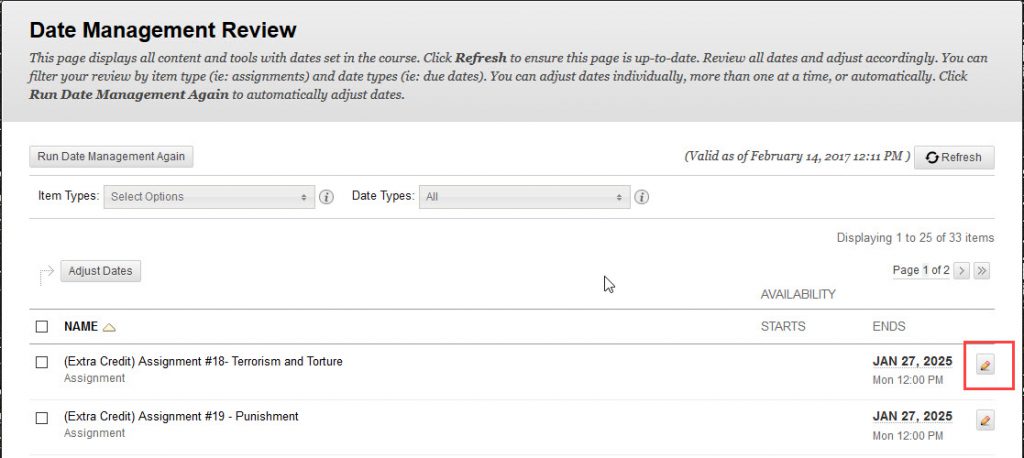
- Click on the pencil icon to the far right of the item you wish to edit.
- Click on the Calendar to choose the due date or availability date you wish to set or manually type in the date, then click the green check mark button.
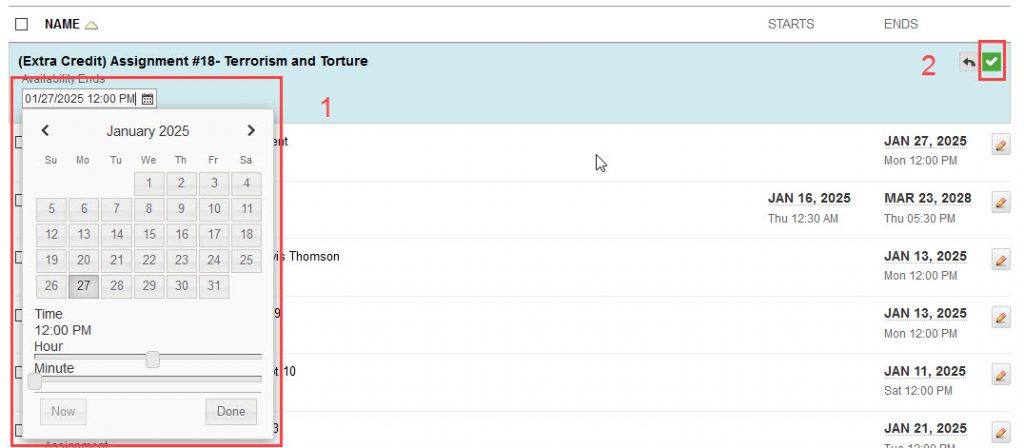
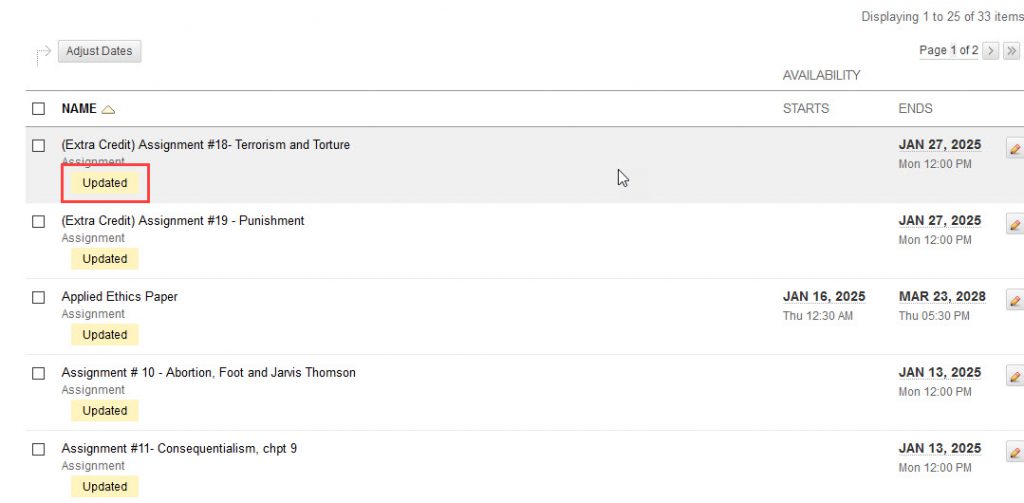
- Once the item is edited, “updated” will appear below the item. Continue to do this for all of the items you wish to change. Keep in mind that there may be more than one page of items to edit, so be sure to continue on to the second (or third) page to ensure all the dates get changed.
- You also have the option of organizing by “Item Type” or “Date Type.” For instance, if you only want to change the dates on Assignments or Announcements, then you can click the box next to “Item Type” and select the type of item you wish to change. You can also select the box next to “Date Type” to only change the items with due dates (as opposed to availability dates).

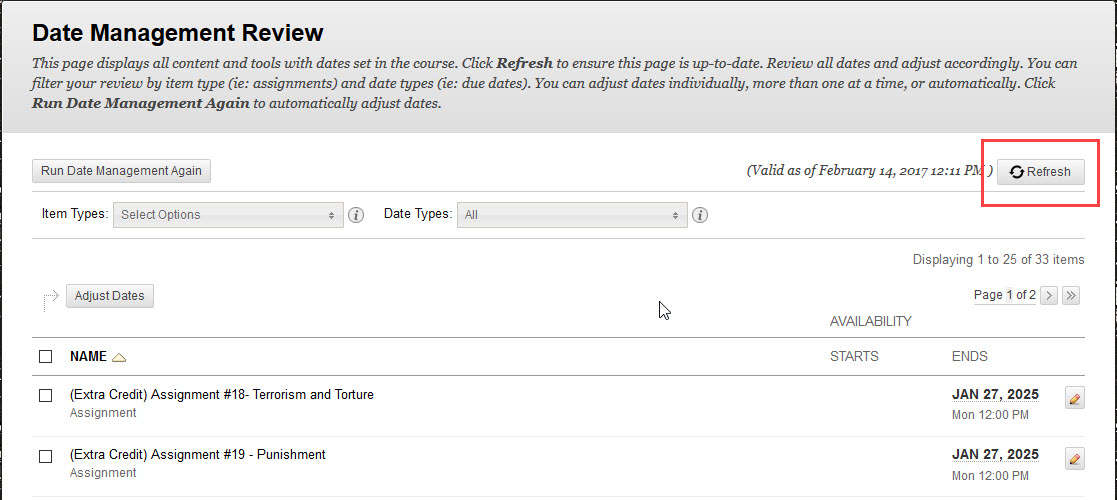
- If you are changing many dates, you may wish to click the Refresh button occasionally to see that the dates have been changed correctly.


While the above option is recommended, below there are three other options to consider when utilizing the Date Management Tool.
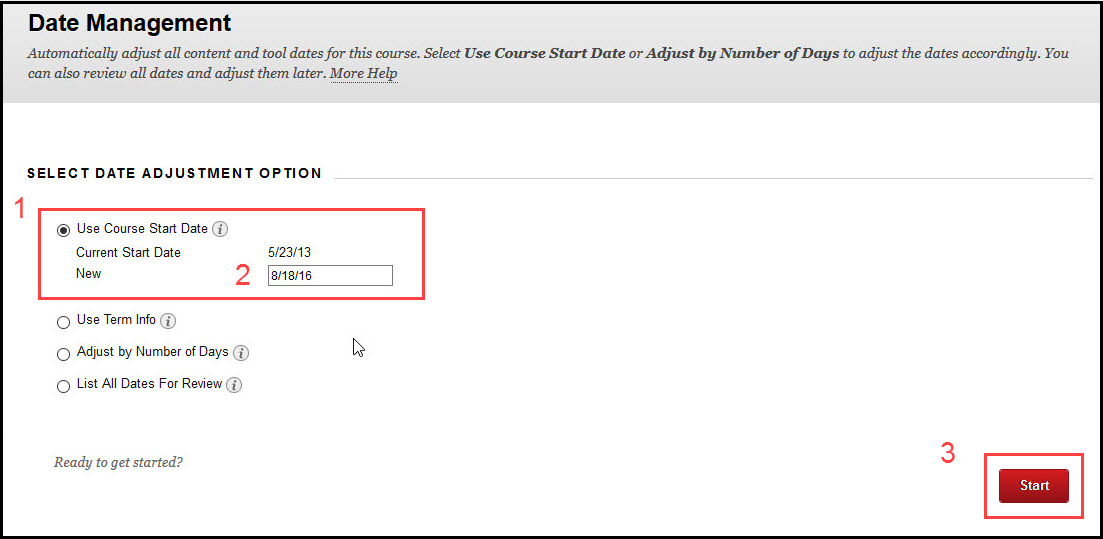
Option B: Use Course Start Date
- Click the “Use Course Start Date” option. In the box next to “New” type in the date, then click the Start button.

- Once the Date Management tool has processed the request, click the Next button. You will receive an email when the request has been processed.
- You should have a list of all of the assignments, tools, content items, etc that have due dates and/or availability dates. All of the edited items with the dates will appear. Be sure to check that the dates are correct.
Important Note: Only those things that already have due dates or availability dates will appear here. If you want to add a due date or availability date to something that does not have one, you will need to go in and manually change this by going to the assignment, item, etc. you wish to change and editing it from there. - If the dates are incorrect, there are two different options to change them.
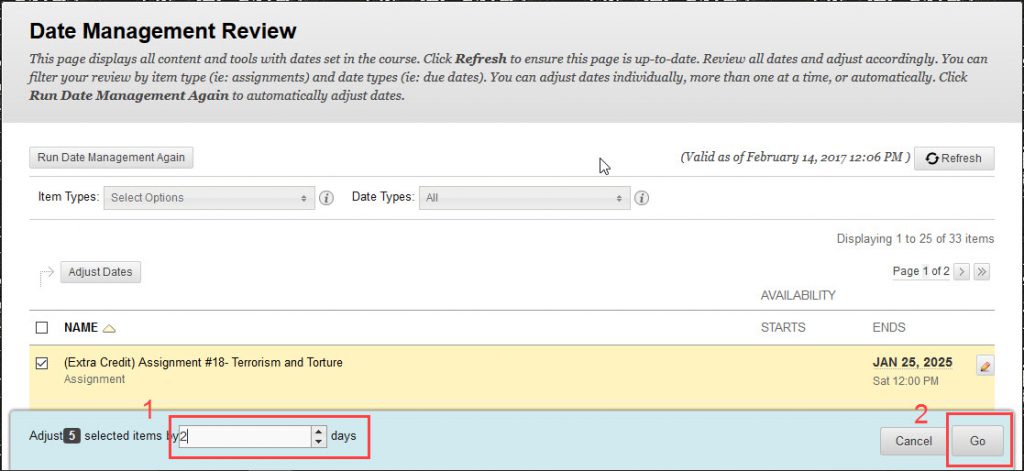
A. If all of the dates are off by say, 2 days, you first select the items that need to be adjusted and click the Adjust Dates button.

A box will appear at the bottom of the screen. Type in the number of days you wish to adjust the due dates by, in this case 2, then click the Go button.
B. If you need to change some or all of the dates, click on the pencil icon to the far right of the item you wish to edit.
Click on the calendar to change the date, then click the green check mark button.
- You also have the option of organizing by “Item Type” or “Date Type.” For instance, if you only want to change the dates on Assignments or Announcements, then you can click the drop down for”Item Types” and select the type of item you wish to change. You can also select the box next to “Date Type” to only change the items with due dates (as opposed to availability dates).
- If you are changing many dates, you may wish to click the Refresh button occasionally to see that the dates have been changed correctly.


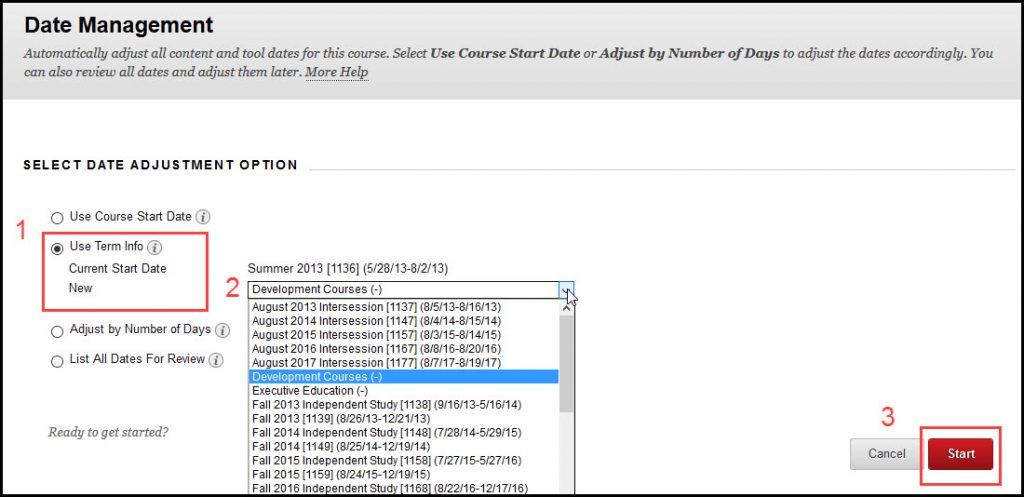
Option C: Use Term Info
- Click the “Use Term Info” option. Select the term information you wish to use, for example “Fall 2020” or “Spring 2021” then click the Start button.
- Once the Date Management tool has processed the request, click the Next button. You will receive an email when the request has been processed.
- You should have a list of all of the assignments, tools, content items, etc that have due dates and/or availability dates. All of the edited items with the dates will appear. Be sure to check that the dates are correct.
Important Note: Only those things that already have due dates or availability dates will appear here. If you want to add a due date or availability date to something that does not have one, you will need to go in and manually change this by going to the assignment, item, etc. you wish to change and editing it from there.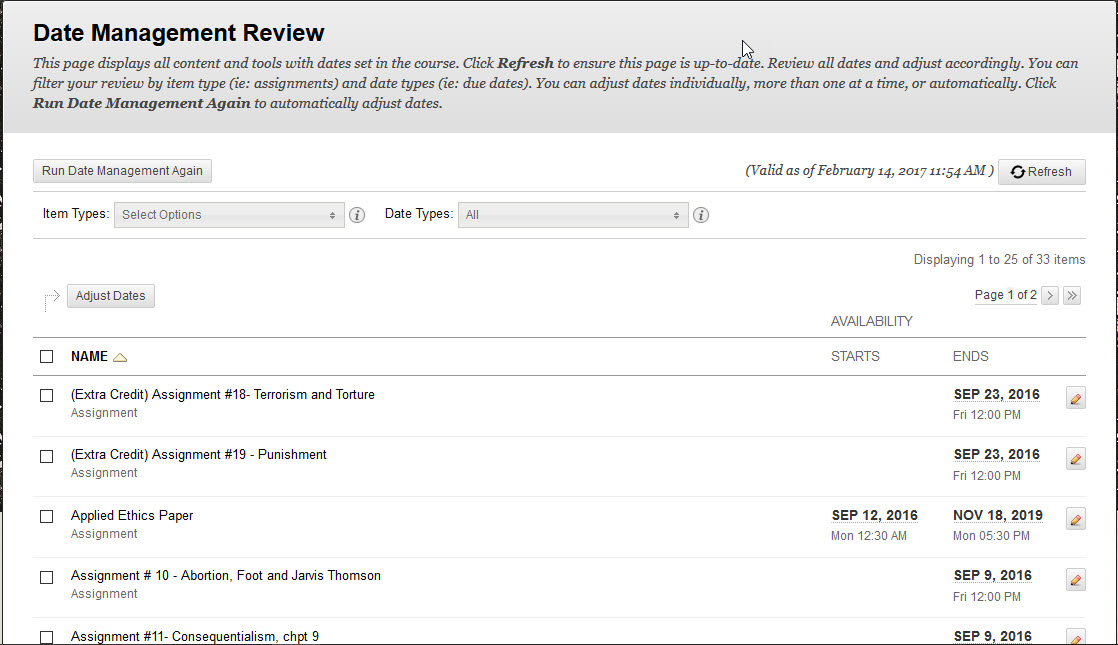
- If the dates are incorrect there are two different options to change them.
A. If all of the dates are off by say, 2 days, you first select the items that need to be adjusted and click the Adjust Dates button.
A box will appear at the bottom of the screen. Type in the number of days you wish to adjust the due dates by, in this case 2, then click the Go button.
B. If you need to change some or all of the dates, click on the pencil icon to the far right of the item you wish to edit.
Click on the calendar to change the date, then click the green check mark button.
- You also have the option of organizing by “Item Type” or “Date Type.” For instance, if you only want to change the dates on Assignments or Announcements, then you can click the box next to “Item Type” and select the type of item you wish to change. You can also select the box next to “Date Type” to only change the items with due dates (as opposed to availability dates).
- If you are changing many dates, you may wish to click the Refresh button occasionally to see that the dates have been changed correctly.

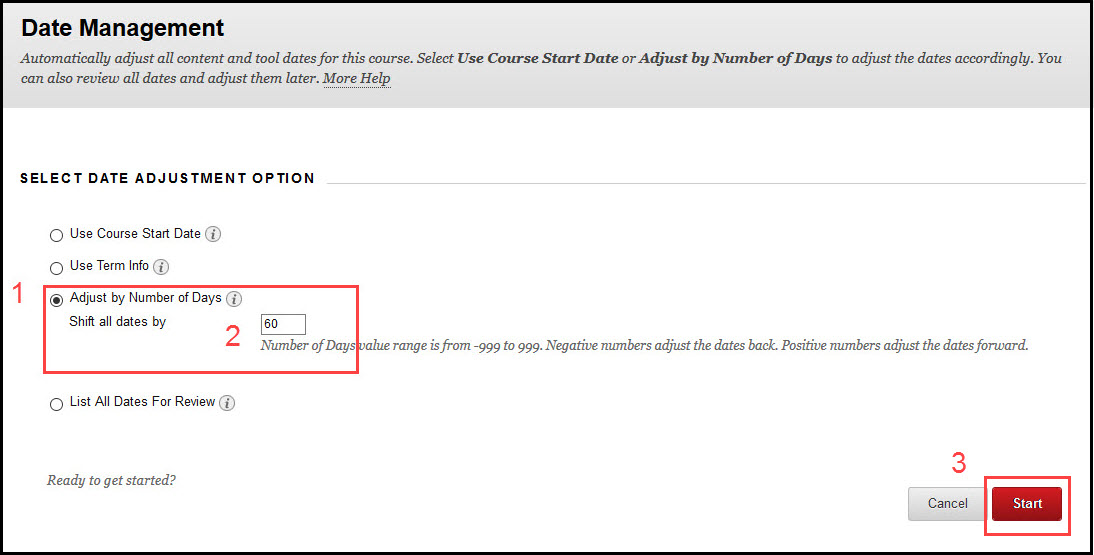
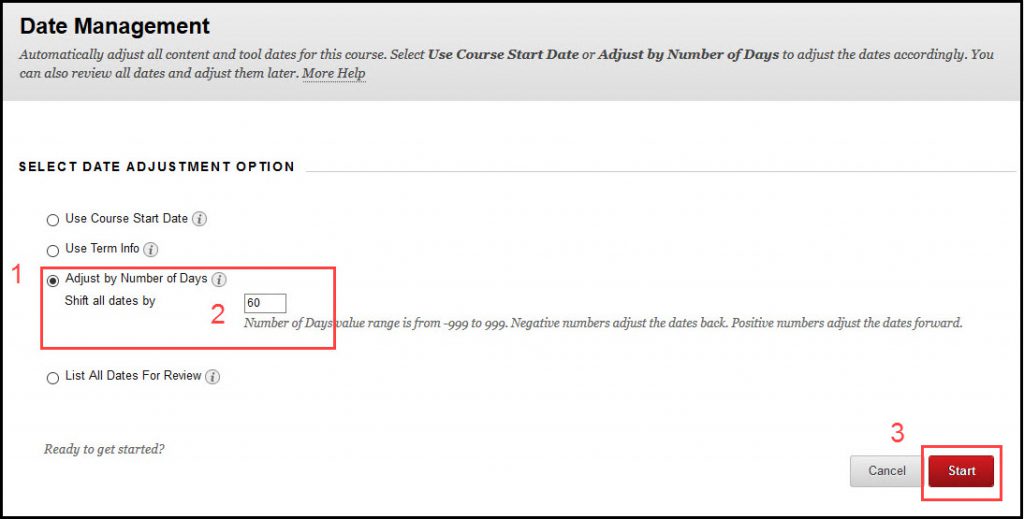
Option D: Adjust By Number of Days
- Click the “Adjust By Number of Days” option. Type the number of days by which you wish to adjust in the box next to “Shift All Dates by,” then click the Start button.
Note: Negative numbers will adjust dates back.
- Once the Date Management tool has processed the request, click the Next button. You will receive an email when the request has been processed.
- You should have a list of all of the assignments, tools, content items, etc that have due dates and/or availability dates. All of the edited items with the dates will appear. Be sure to check that the dates are correct.
Important Note: Only those things that already have due dates or availability dates will appear here. If you want to add a due date or availability date to something that does not have one, you will need to go in and manually change this by going to the assignment, item, etc. you wish to change and editing it from there. - If the dates are incorrect there are two different options to change them.
A. If all of the dates are off by say, 2 days, you first select the items that need to be adjusted and click the Adjust Dates button.
A box will appear at the bottom of the screen. Type in the number of days you wish to adjust the due dates by, in this case 2, then click the Go button.
B. If you need to change some or all of the dates, click on the pencil icon to the far right of the item you wish to edit.
Click on the calendar to change the date, then click the green check mark button.
- You also have the option of organizing by “Item Type” or “Date Type.” For instance, if you only want to change the dates on Assignments or Announcements, then you can click the box next to “Item Type” and select the type of item you wish to change. You can also select the box next to “Date Type” to only change the items with due dates (as opposed to availability dates).
- If you are changing many dates, you may wish to click the Refresh button occasionally to see that the dates have been changed correctly.