Sometimes it might be necessary to change all due dates at once in a course. For instance, when you copy a course from a previous semester. It is time-consuming to go through and change the due dates or set the availability for assignments, journals, announcements, and other content items. The Batch Edit tool is a way to change all of the due dates and the availability dates in a single place.
You can use Batch Edit to update due dates and date-related release conditions:
- Open your Blackboard Ultra Course.
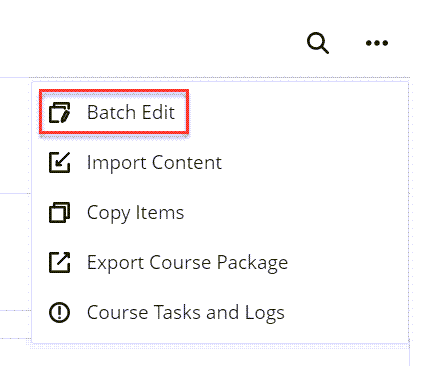
- Click on the … in the upper-right-hand corner of the screen to open More options.

- Click Batch edit.
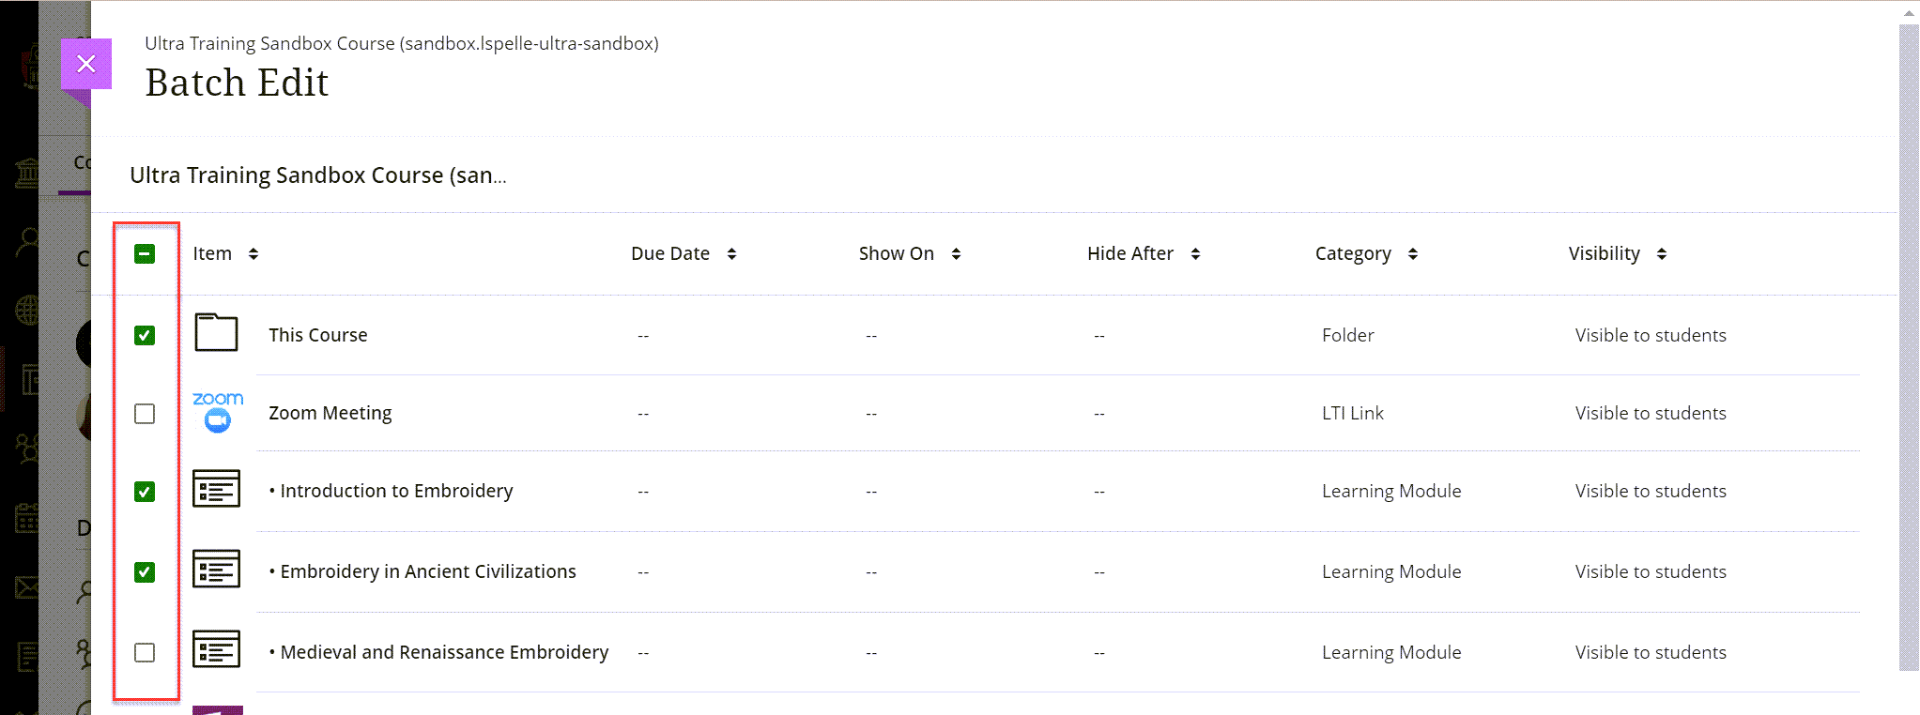
- Click the checkbox next to the items you want to update. You can choose individual content items, folders, learning modules, or all items.
- Click Options in the lower-right-hand corner.
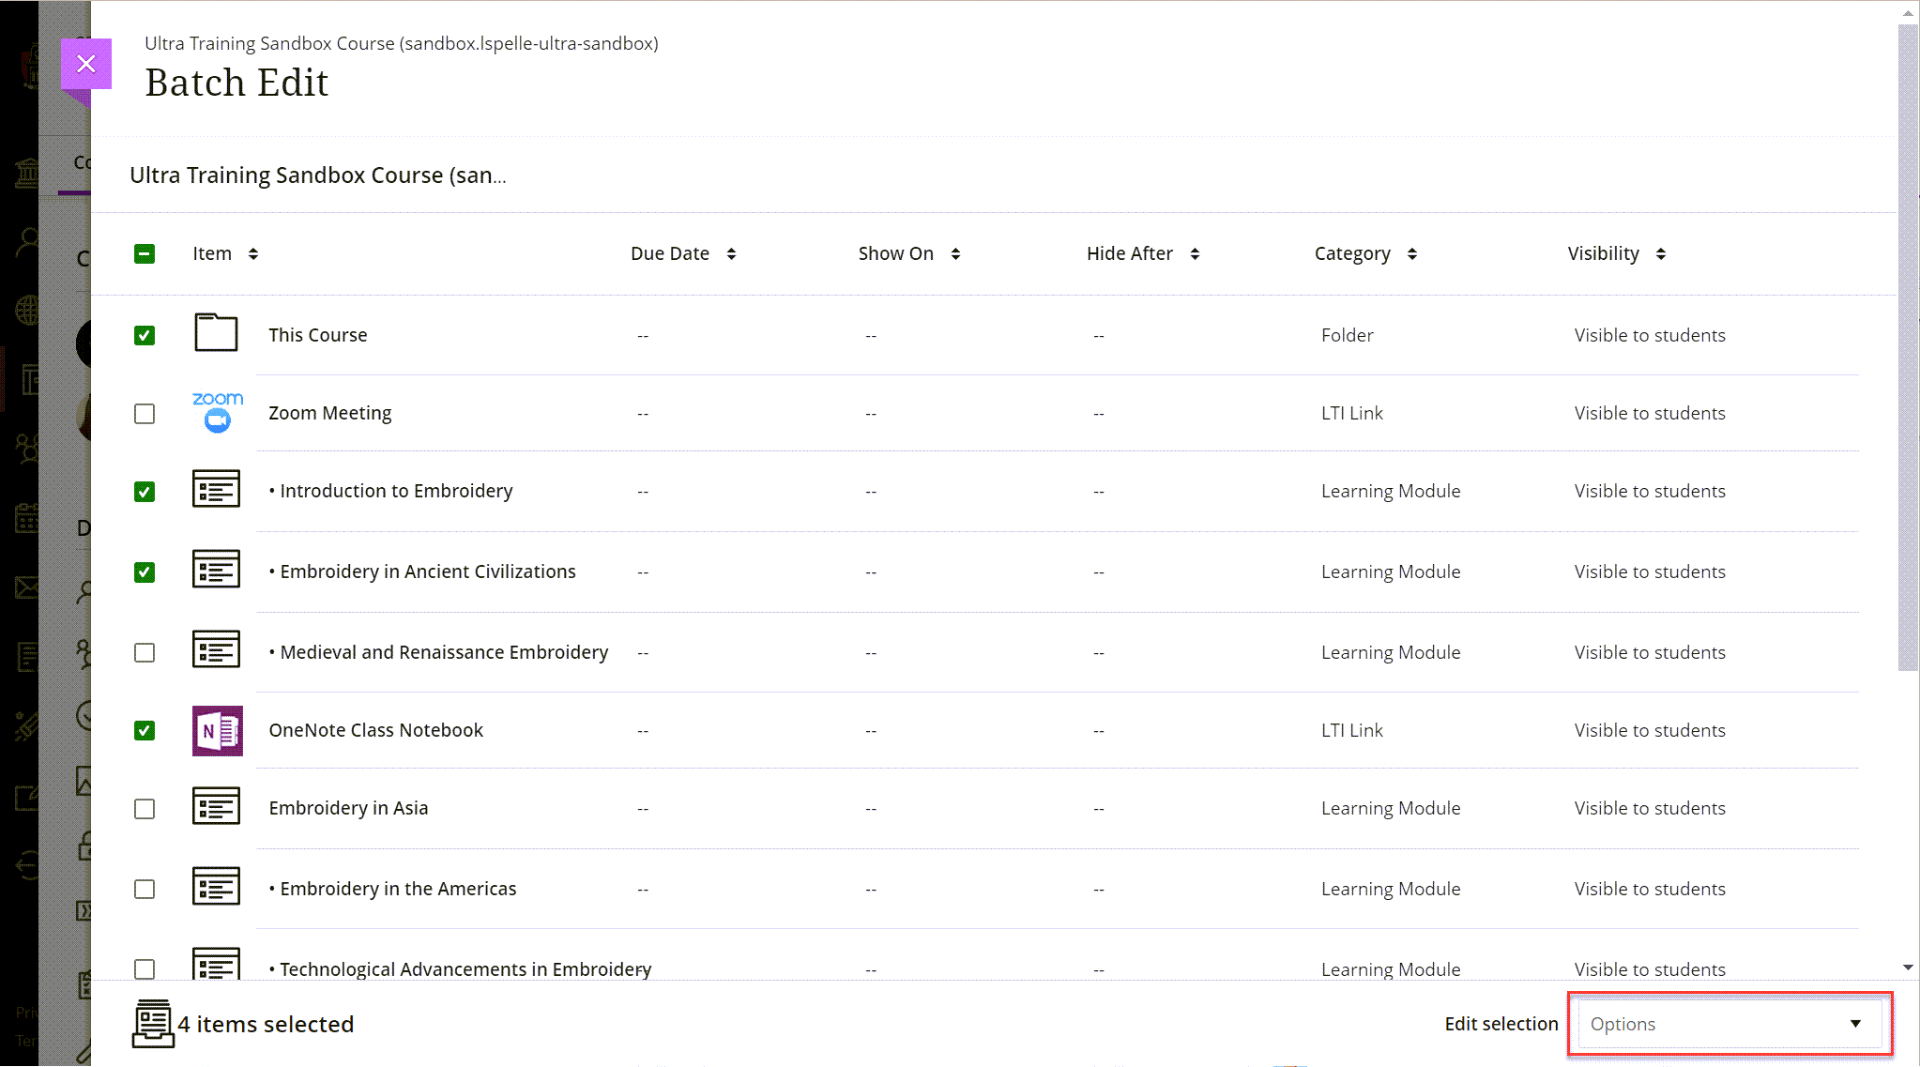
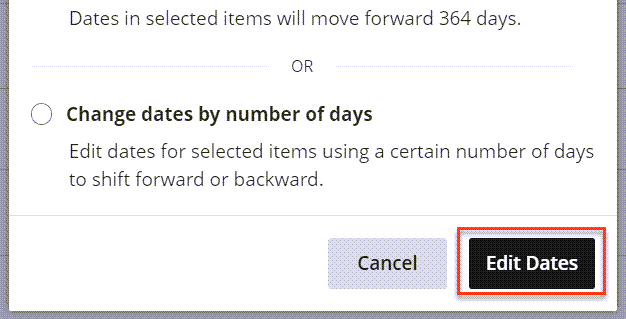
- Click Edit dates.

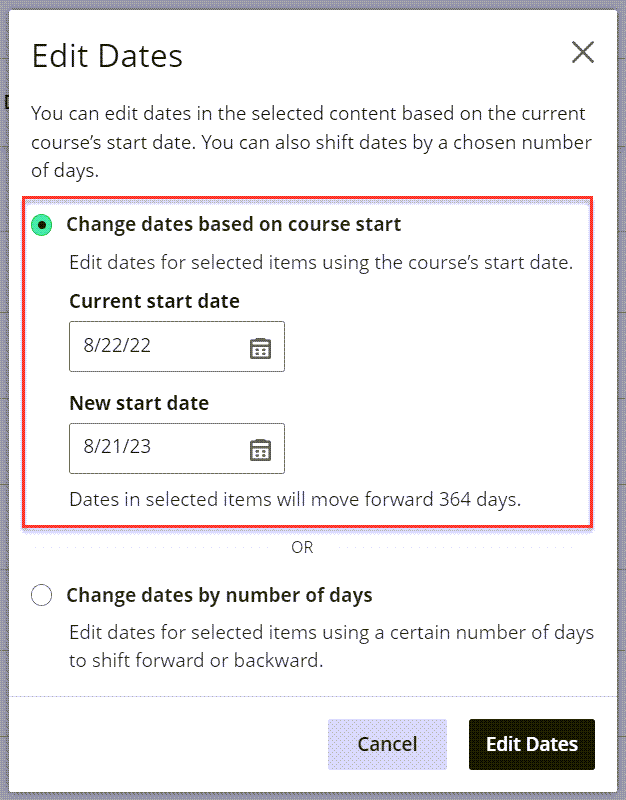
- You have two options to edit dates:
- Change dates based on course start: Add the previous start date for the course and the new start date. Batch-Edit will calculate the number of days between the two dates and adjust all dates using that number. After you choose the two dates, a message appears to confirm how many days are between them. Example: My course content was reused from the previous semester when the course’s start date was August 19, 2019. The course’s new start date is January 6, 2020. All dates for the items selected will be adjusted forward 140 days.
- Change dates by number of days: Enter a number in the Shift dates forward or Shift dates backward fields. All dates for the items selected will be adjusted forward or backward based on the field and number you choose. Example: My course is all set up, but a snowstorm at the start of the semester pushes the academic calendar a few days. All due dates add 4 days.
- Change to specific date and/or time: Edit dates and/or times for selected items to a specific date and/or time. Example: I want to edit all of my due dates to be 11:59 pm instead of midnight.
- Click Edit Dates.
- A message appears to confirm your content was updated successfully. Select View Details to confirm changes.
This will change all dates at once!