There are three ways to include a file from OneDrive in your course. You can upload the file from your OneDrive account, you can embed the file from your OneDrive account, or you can create a collaborative file.
- Uploading – This option allows you to upload a file from your OneDrive without first downloading it to your computer.
NOTE: When you use this option, the size of your file applies to your overall course quota. So if your file is very large you might want to consider using embedding instead. - Embedding – This option uploads a copy of the file to a SharePoint folder for the course. This copy on SharePoint can be edited by the instructor only. However, you cannot edit the original in your OneDrive and see those changes reflected in the version in the course.
- Collaborative Files – This option uploads a copy of the file to a SharePoint folder for the course. Both students and the instructor can edit this file. No changes are made to the original file on OneDrive since this is a copy.
Click on one of the options below:
Uploading Files from OneDrive
In Blackboard Learn Ultra you can upload files directly from your OneDrive account without having to first download them to your computer. Just remember this does not make a permanent connection between OneDrive and Blackboard. It instead creates a copy of the file in Blackboard that is then visible to students.
NOTE: When you use this option, the size of your file applies to your overall course quota. So if your file is very large you might want to consider using embedding instead.
- Open your Blackboard Learn Ultra course.
- Browse to the location in your course that you want to upload the file to, and click the plus sign (+).

- Click Cloud Storage.

- Click OneDrive.

- Click Connect to OneDrive.

- Log in with your UARK username and password.
- Click the box next to each of the files or folders you want to include.

NOTE: Adding a folder adds each individual file from that folder to the course. - Click Select.

- Click Import.

NOTE: This creates a copy of the file that is then stored within Blackboard. It is not a permanent connection to the original OneDrive file.
Important: Don’t forget to make the file visible to students.
Embedding Files from OneDrive
When you embed a file from OneDrive into your course it uploads a copy of that file to a SharePoint folder for the course. This copy on SharePoint can be edited by the instructor only. However, you cannot edit the original in your OneDrive and see those changes reflected in the version in the course. Changes must be made directly to the file through Blackboard or SharePoint.
- Open your Blackboard Learn Ultra course.
- Browse to the location in your course that you want to upload the file to, and click the plus sign (+).
- Click Create.

- Click Embedded Cloud Document.

- Click Sign in and sign in using your UARK username and password.

- Click the files that you want to include.

- Click Select.

- Add an optional description and click Save.

This saves a copy of the file (not the original) to a SharePoint site for the course. - Click Edit Document to make changes to the document in your SharePoint site.

IMPORTANT: Don’t forget to make the file visible to students.
Collaborative Files in OneDrive
Using Collaborative Files in Blackboard uploads a copy of the file to a SharePoint folder for the course. Both students and the instructor can edit this file. No changes are made to the original file on OneDrive since this is a copy.
- Open your Blackboard Learn Ultra course.
- Browse to the location in your course that you want to upload the file to, and click the plus sign (+).
- Click Create.
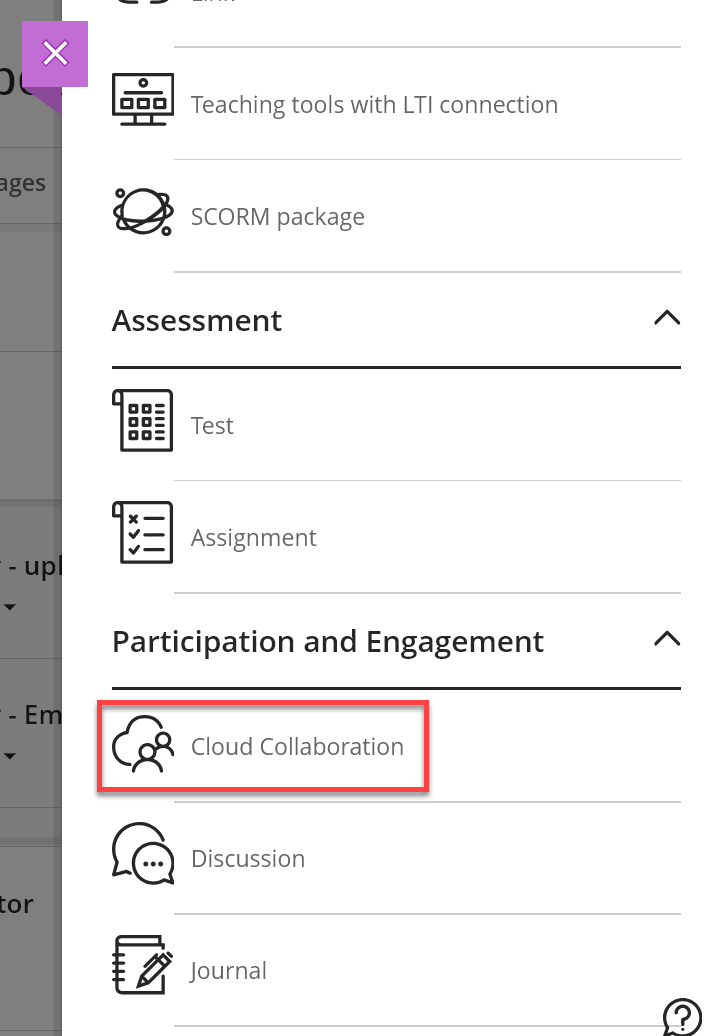
- Scroll down and click Cloud Collaboration under Participation and Engagement.
- Click Sign in and sign in using your UARK username and password.
- Either choose a type of file to create (1) or Click Select Existing Document (2).

- Click the file you want to include.
- Click Select.
- Be sure that there is a name in the Document Name field.

- Click Save.
 NOTE: If you choose Select Existing Document, this saves a copy of the file (not the original) to a SharePoint site for the course.
 - Add an optional description and click Save.
- Click Edit Document to make changes to the document in your SharePoint site.
IMPORTANT: Don’t forget to make the file visible to students.