Are you unable to access the scroll bar when using Blackboard on your Mac? Mac’s default settings cause the scrollbar to automatically hide itself under certain conditions, and that can sometimes pose a significant functional issue, particularly when you’re unable to scroll & view the entirety of something.
Depending on how your computer is set up and the version of MacOS you’re using, the best method to find & change scrollbar settings may vary a little bit. Apple changed menu layouts for MacOS version Ventura, so we have two separate expandable guide sections below to address both older & newer menu layouts.
MacOS Monterey and Older:
Method A:
- Click on the System Preferences Icon on your Dock Menu. (This may be at the left side of your screen or along the bottom.)

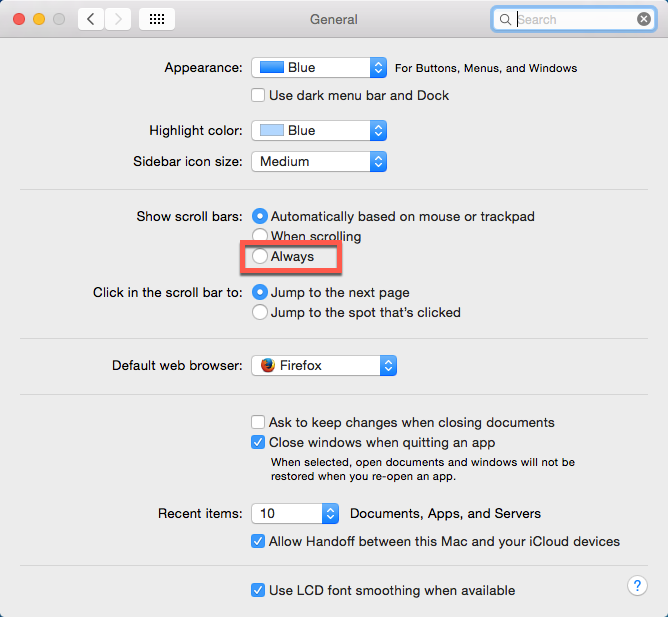
- Click General.

- Under “Show scroll bars” click Always.
Method B:
If the System Preferences Icon is not pinned to your Dock Menu:
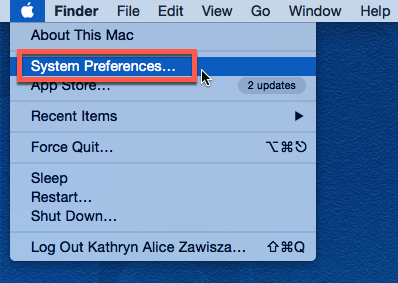
- Click on the Apple Icon located in the upper left of the screen.

- Select System Preferences…
- Click General.
- Under “Show scroll bars” click Always.
Method C:
Alternatively, if they System Preferences Icon is not pinned to your Dock Menu:
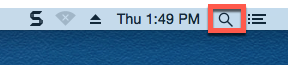
- Click on the search icon in the upper right of the screen.
- Type “settings” or “system preferences.”
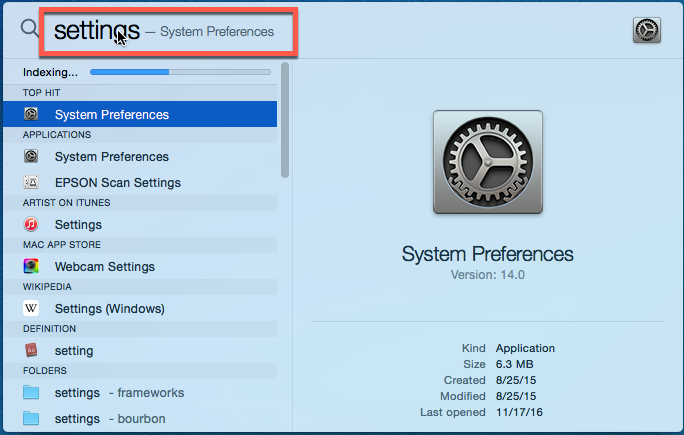
- Select System Preferences.
- Click General.
- Under “Show scroll bars” click Always.
MacOS Ventura and Newer:
Method A:
- Click on the System Settings button on your Dock menu.

- Click on the Appearance tab at the left-hand side of the System Settings menu.

- Under “Show scroll bars“, click Always.

Method B:
This is an alternative method you can use in case you don’t see the System Settings button on the Dock.
- Click on the magnifying glass button near the top-right corner of the screen to open the Spotlight search tool.

- In the resulting search field, type “Appearance” to instantly find that menu, & then press the return key to open it.

- Click on the Appearance tab at the left-hand side of the System Settings menu.
- Under “Show scroll bars“, click Always.