Have you been struggling with creating your own banners for Ultra? No worries! We’ve got you covered with the new Ultra Banner Maker! Even when the size of the browser screen changes, it still looks great!
Visit the Banner Maker to create your own banners for your Ultra courses in Blackboard!
Use the tools on the left side to design your course banner. The banner preview will update as you make changes. Once your banner is finished, click the Download Banner button. The file will be saved to your computer as a .png file with a transparent background that you can add to your course.
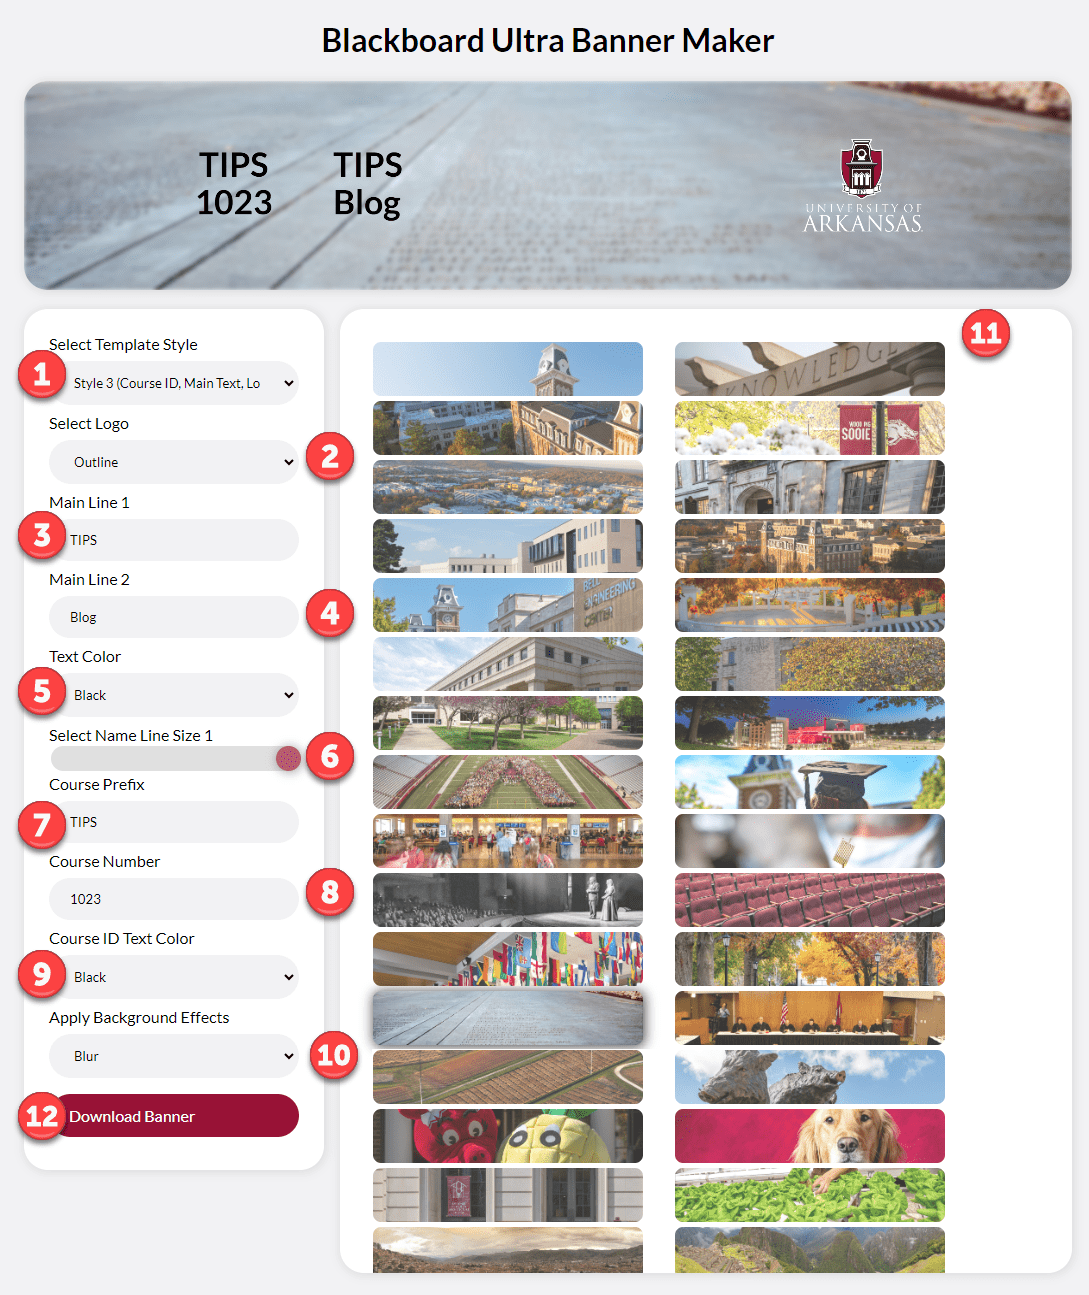
- In the Select Template Style dropdown choose from the template style options.
- Select your preferred Logo options.
- In Main Line 1, type your preferred text.
- In Main Line 2, type your preferred text.
- In Text Color, choose your preferred color.
- Adjust the Select Name Line Size 1 slider bar to adjust the size of your text.
- In Course Prefix, type the prefix of your course name.
- In Course Number, type your course’s number.
- Choose the Course ID Text Color.
- Click on the Apply Background Effects and make your choice.
- Click on an image of your choice on the right.
- Click Download Banner to download the image. The title will be “my-banner.png.”
Now you can add the banner to your course.
Examples of Templates:
Template 1

Template 2

Template 3